
Requirements for integration
To integrate the Zenkipay plugins with the different supported eCommerce platforms (WooCommerce, Magento, PrestaShop), it is necessary to follow these steps:
It’s necessary to have a merchant account in Zenkipay to do the integration. You can find the steps to open your account at the following link: Sign Up.
This step is to recommend to you the best integration option based on the technology you are using. You can find more information at the following link: Scanning your site.
Security is very important at Zenkipay, this is why we ask merchants to generate a pair of keys, public and private. These keys allow the information of the transactions to be encrypted and prevent malicious users from manipulating the data of the purchase orders, in this way we guarantee that the communication between the store and Zenkipay is reliable. You can find the steps to generate your keys at the following link: Preparations for your integration.
The plugin’s webhook will allow Zenkipay to confirm to the store that the payment was completed once the payment has been made by the customer and will change the status of the order, which is initially Pending a Processing (this term will depend on each eCommerce platform).
NOTE: The following example is done with WooCommerce. However, the process is the same for any integration with an eCommerce platform (WooCommerce, Magento, PrestaShop).
- To continue with the webhook configuration, it is necessary to have the plugin installed in the store. Below are the links with the required steps for installation on each of the supported eCommerce platforms:
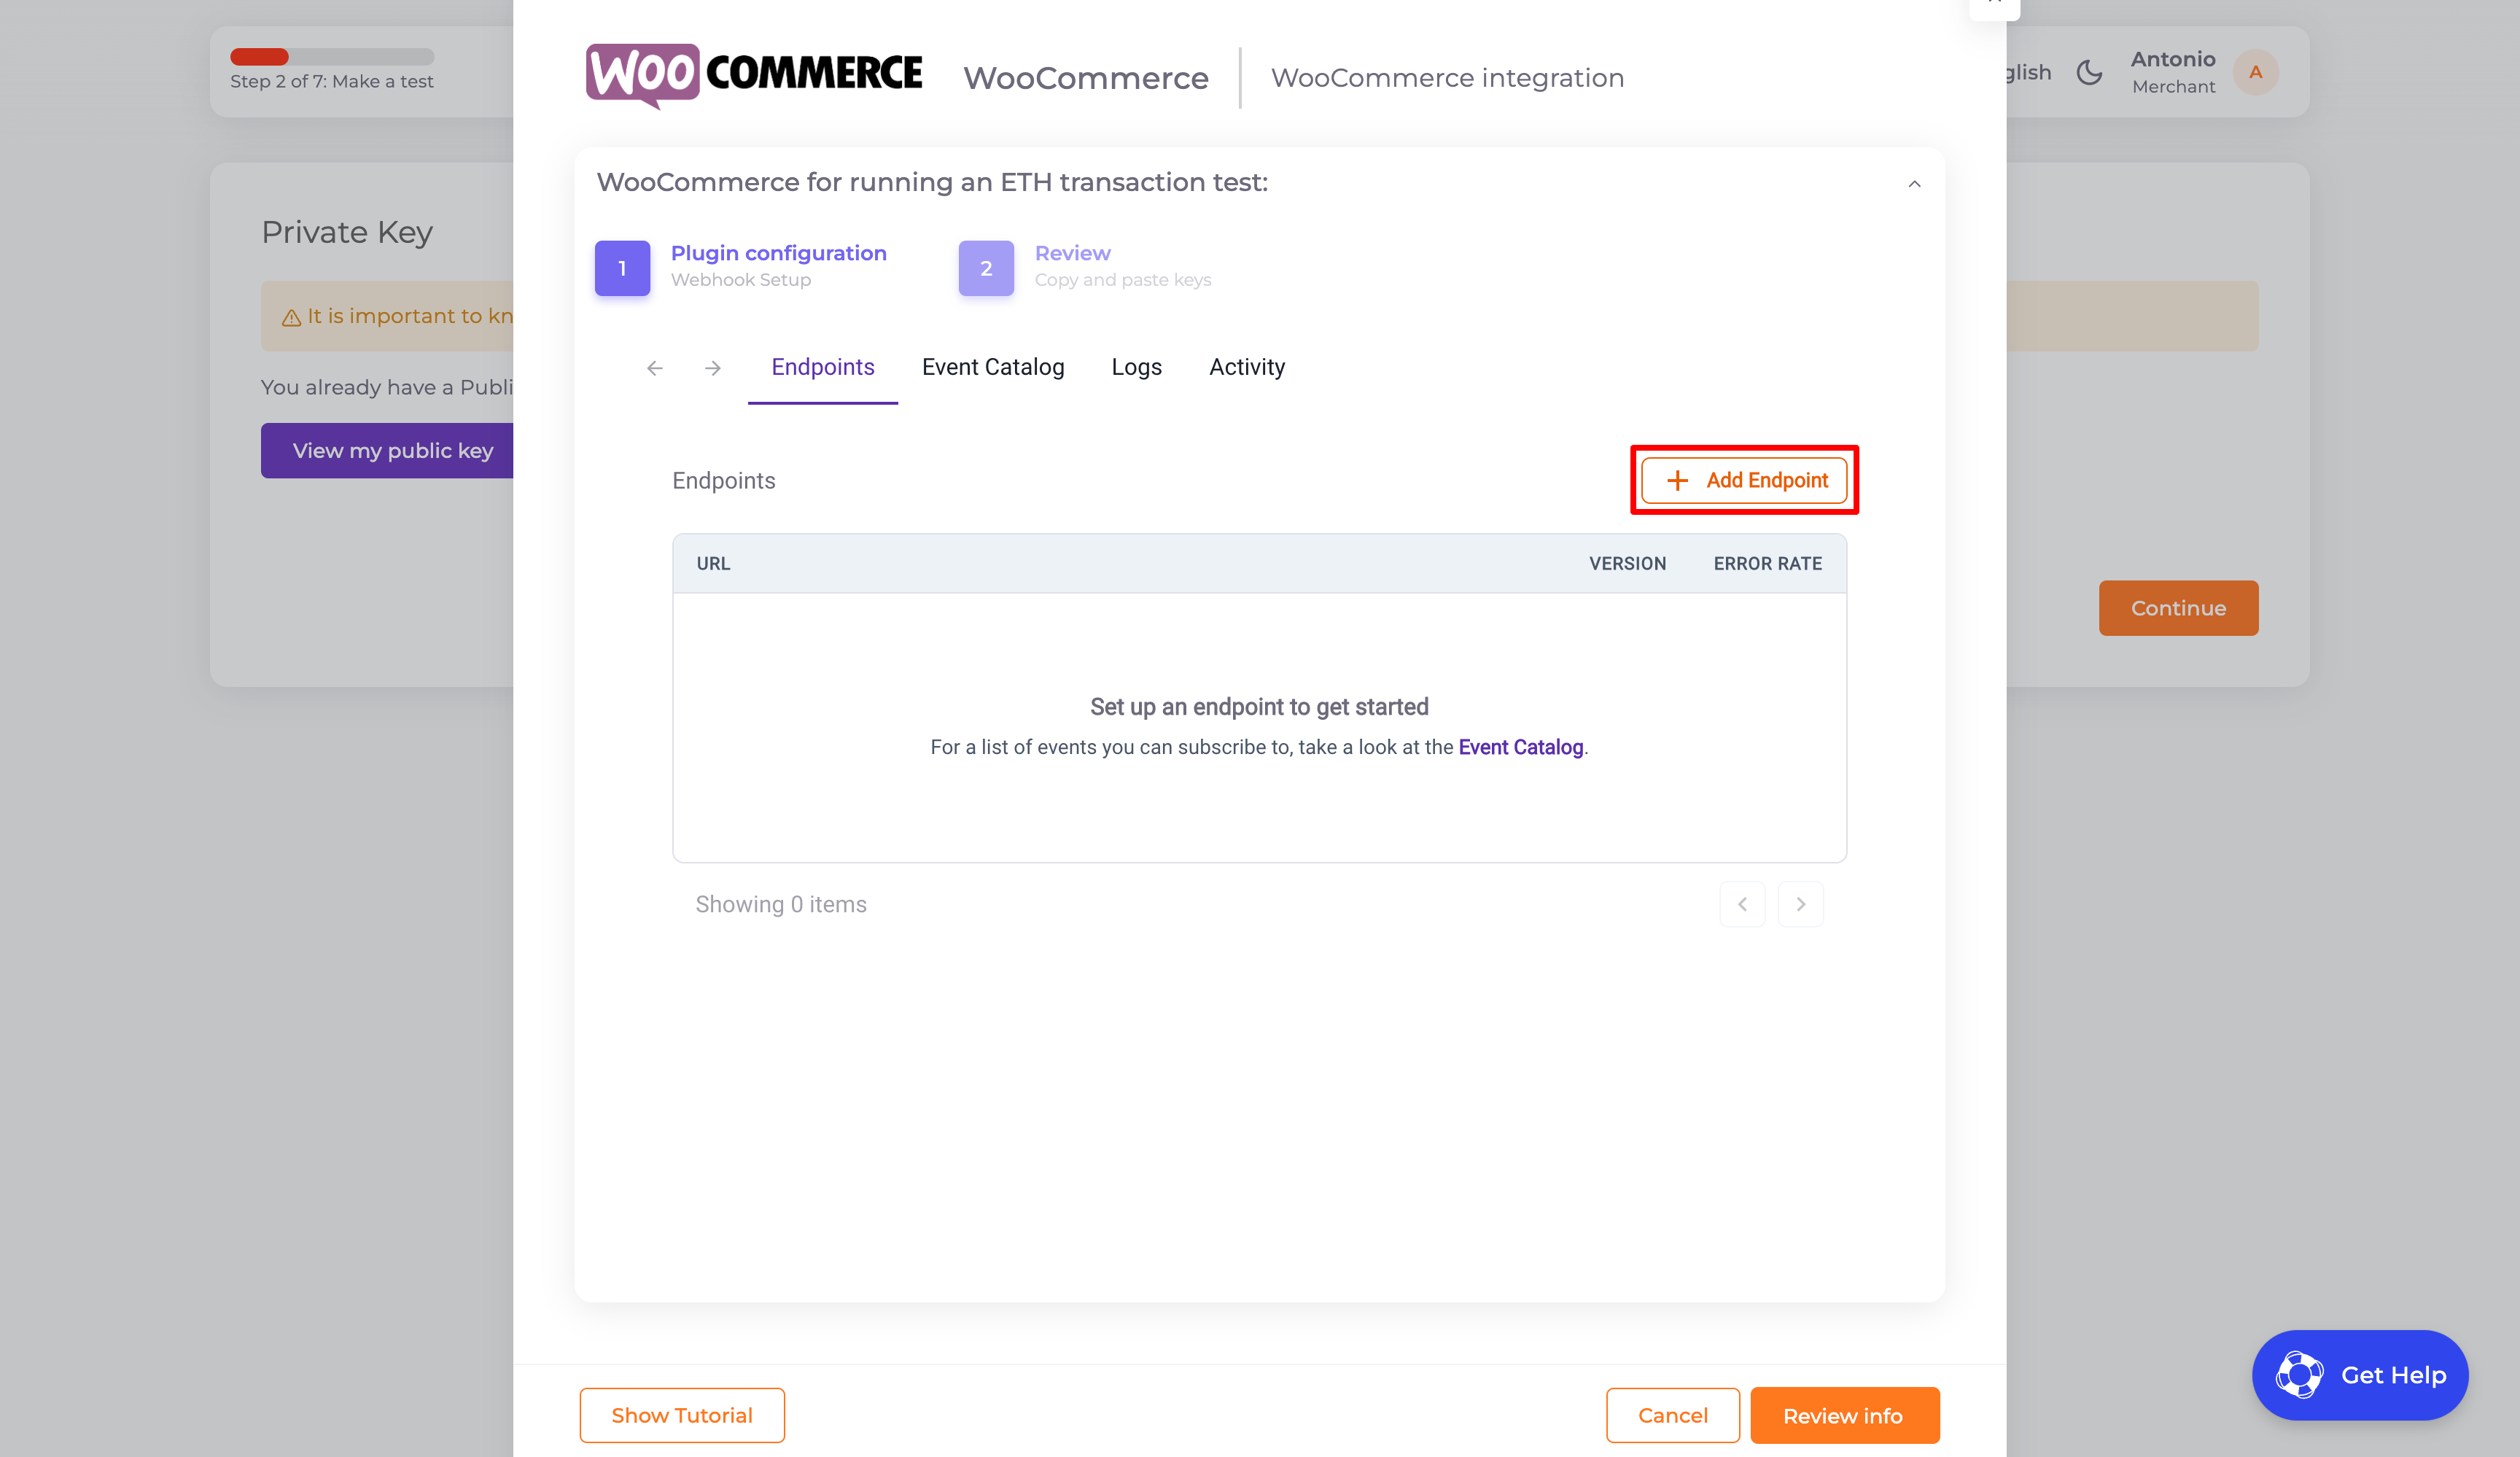
- Once the public and private keys have been generated, the next step is configure the webhook. After clicking on the “Continue” button, the following window will be shown where we must click on the “Add Endpoint” button to enter the endpoint URL of our store and the events that we wish to receive in it.
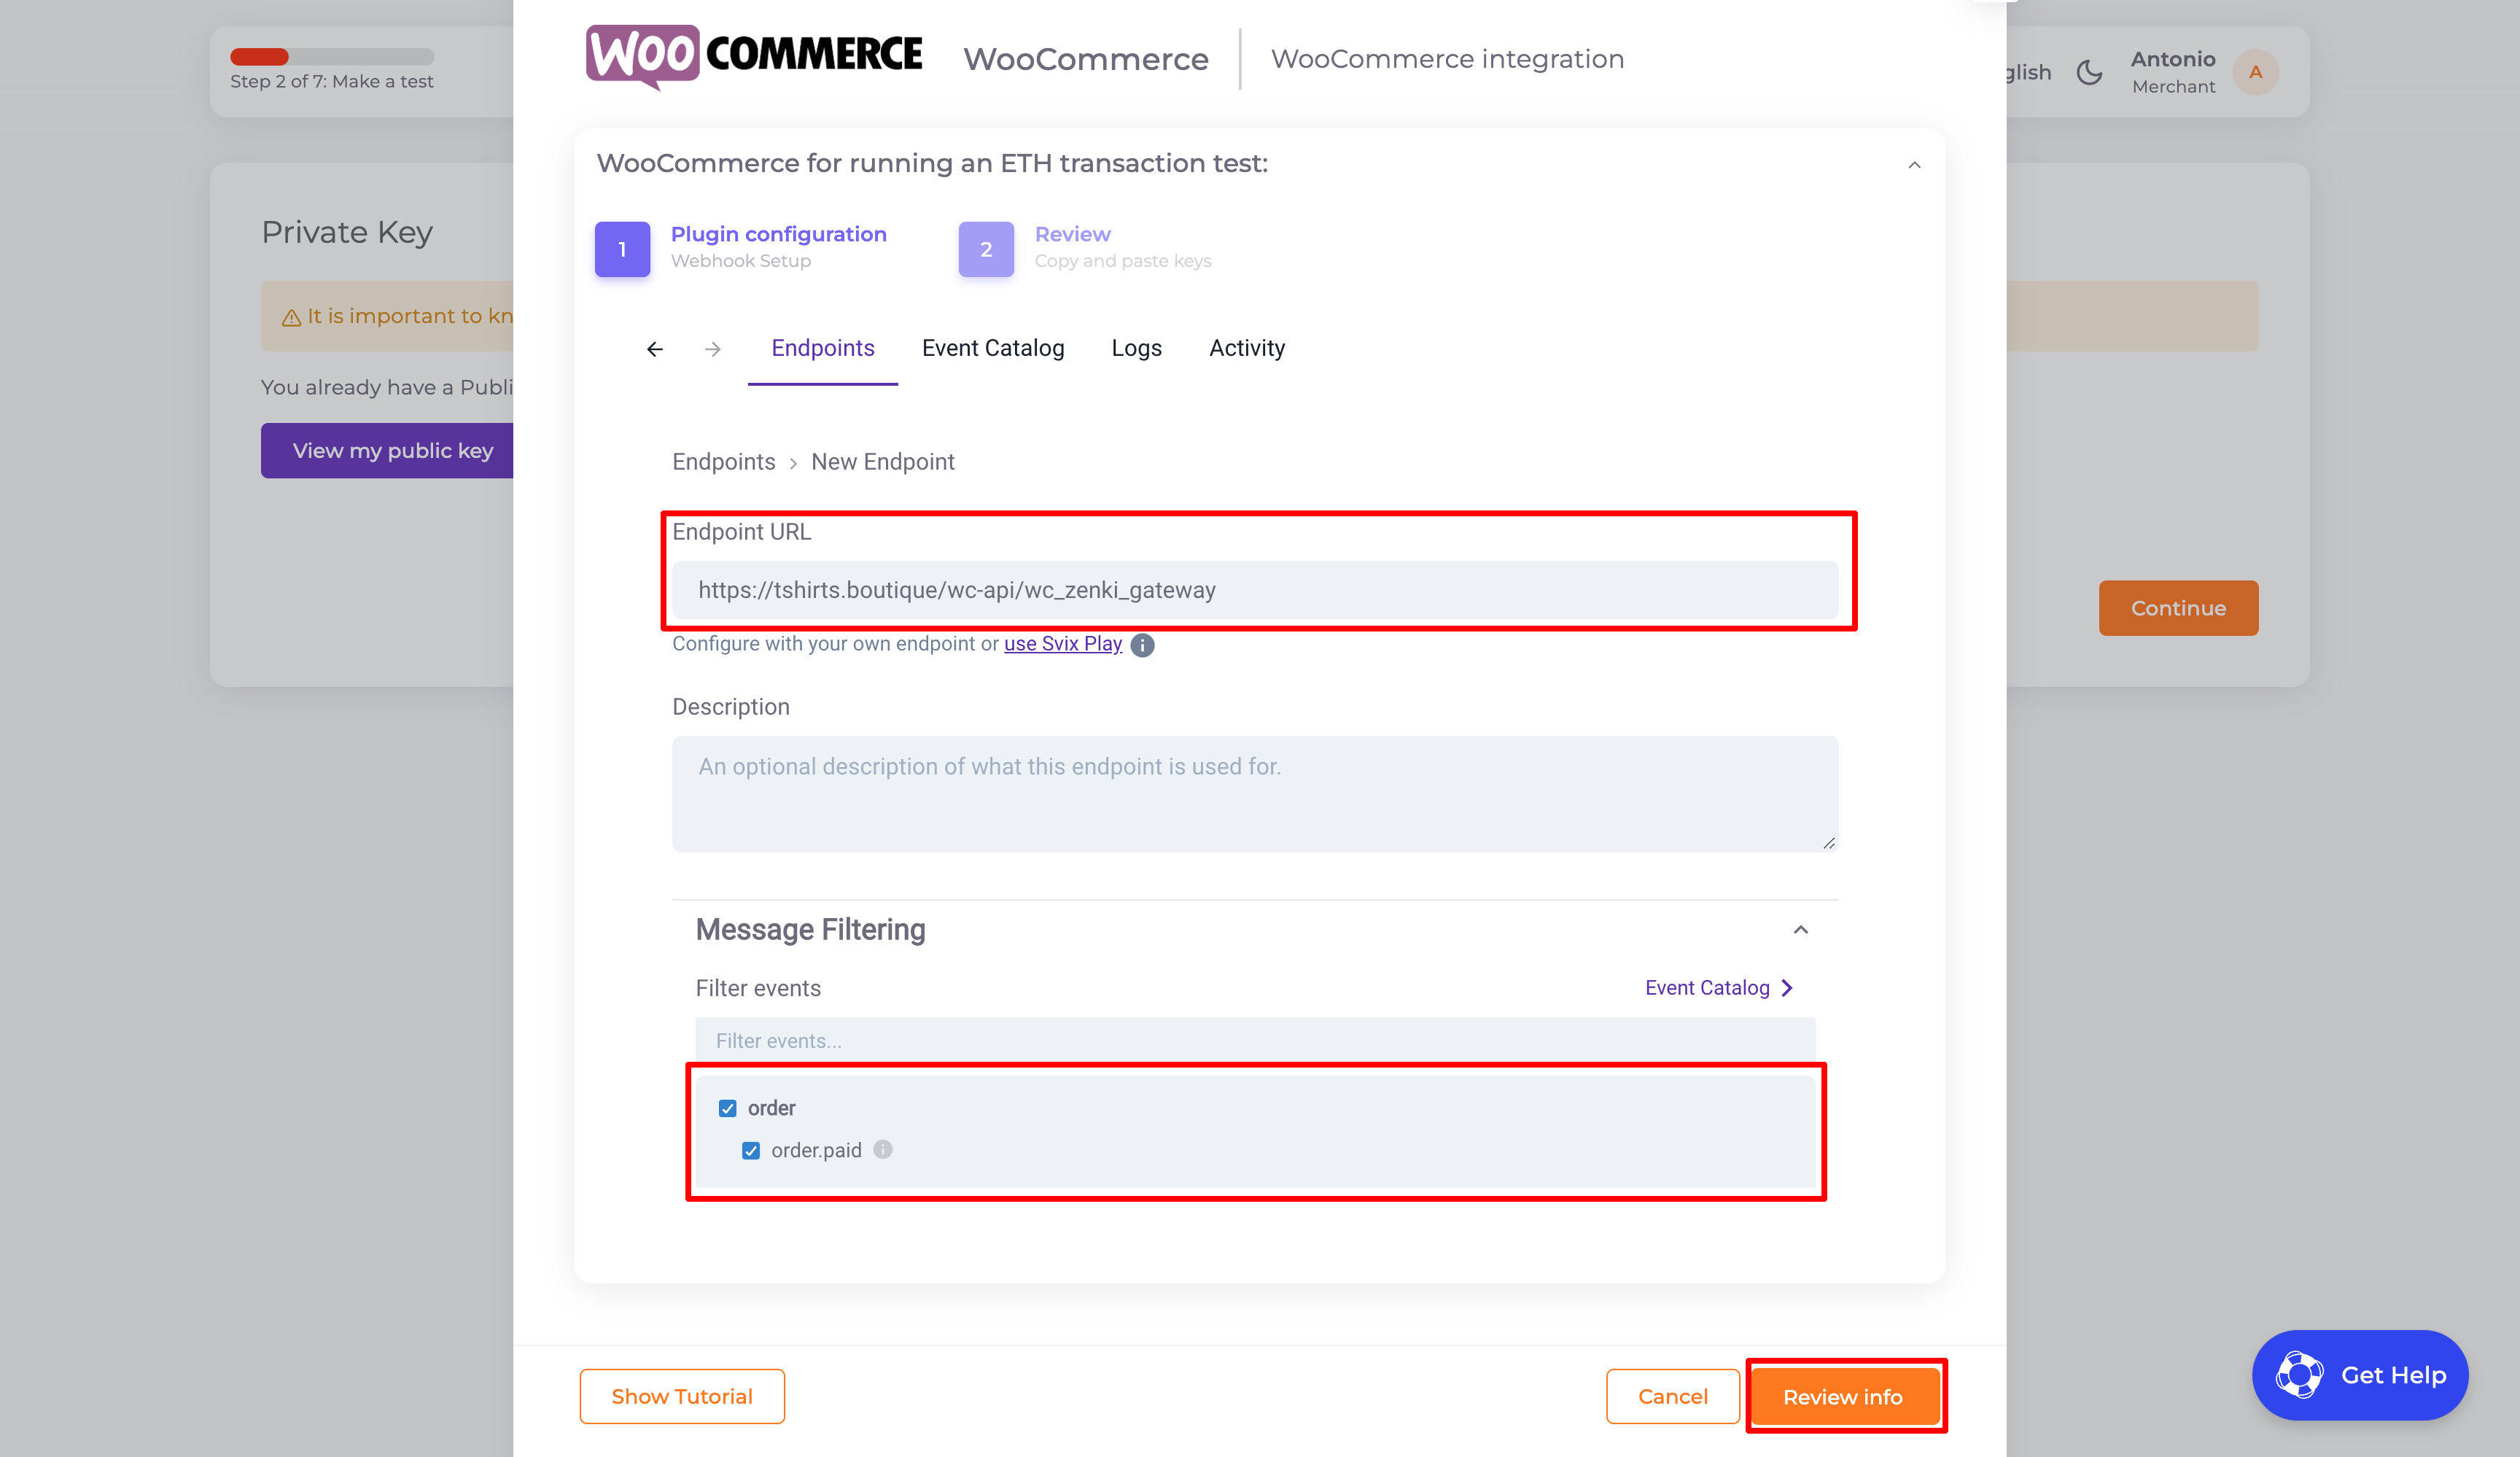
- Now you must enter the webhook URL of the store, which has the following structure https://my-store.com/wc-api/wc_zenki_gateway, where you have to replace the domain my-store.com with yours. It’s important to mention that the structure of the webhook URL is different for each of the platforms::
- WooCommerce: https://my-store.com/wc-api/wc_zenki_gateway
- Magento: https://my-store.com/zenkipay/index/webhook
- PrestaShop: https://my-store.com/module/zenkipay/notification
- It is necessary to check the boxes of the events (notifications) that we want to receive in the webhook: order > order.paid. Once this step is done, we can create the webhook and continue by clicking on the “Review info” button.
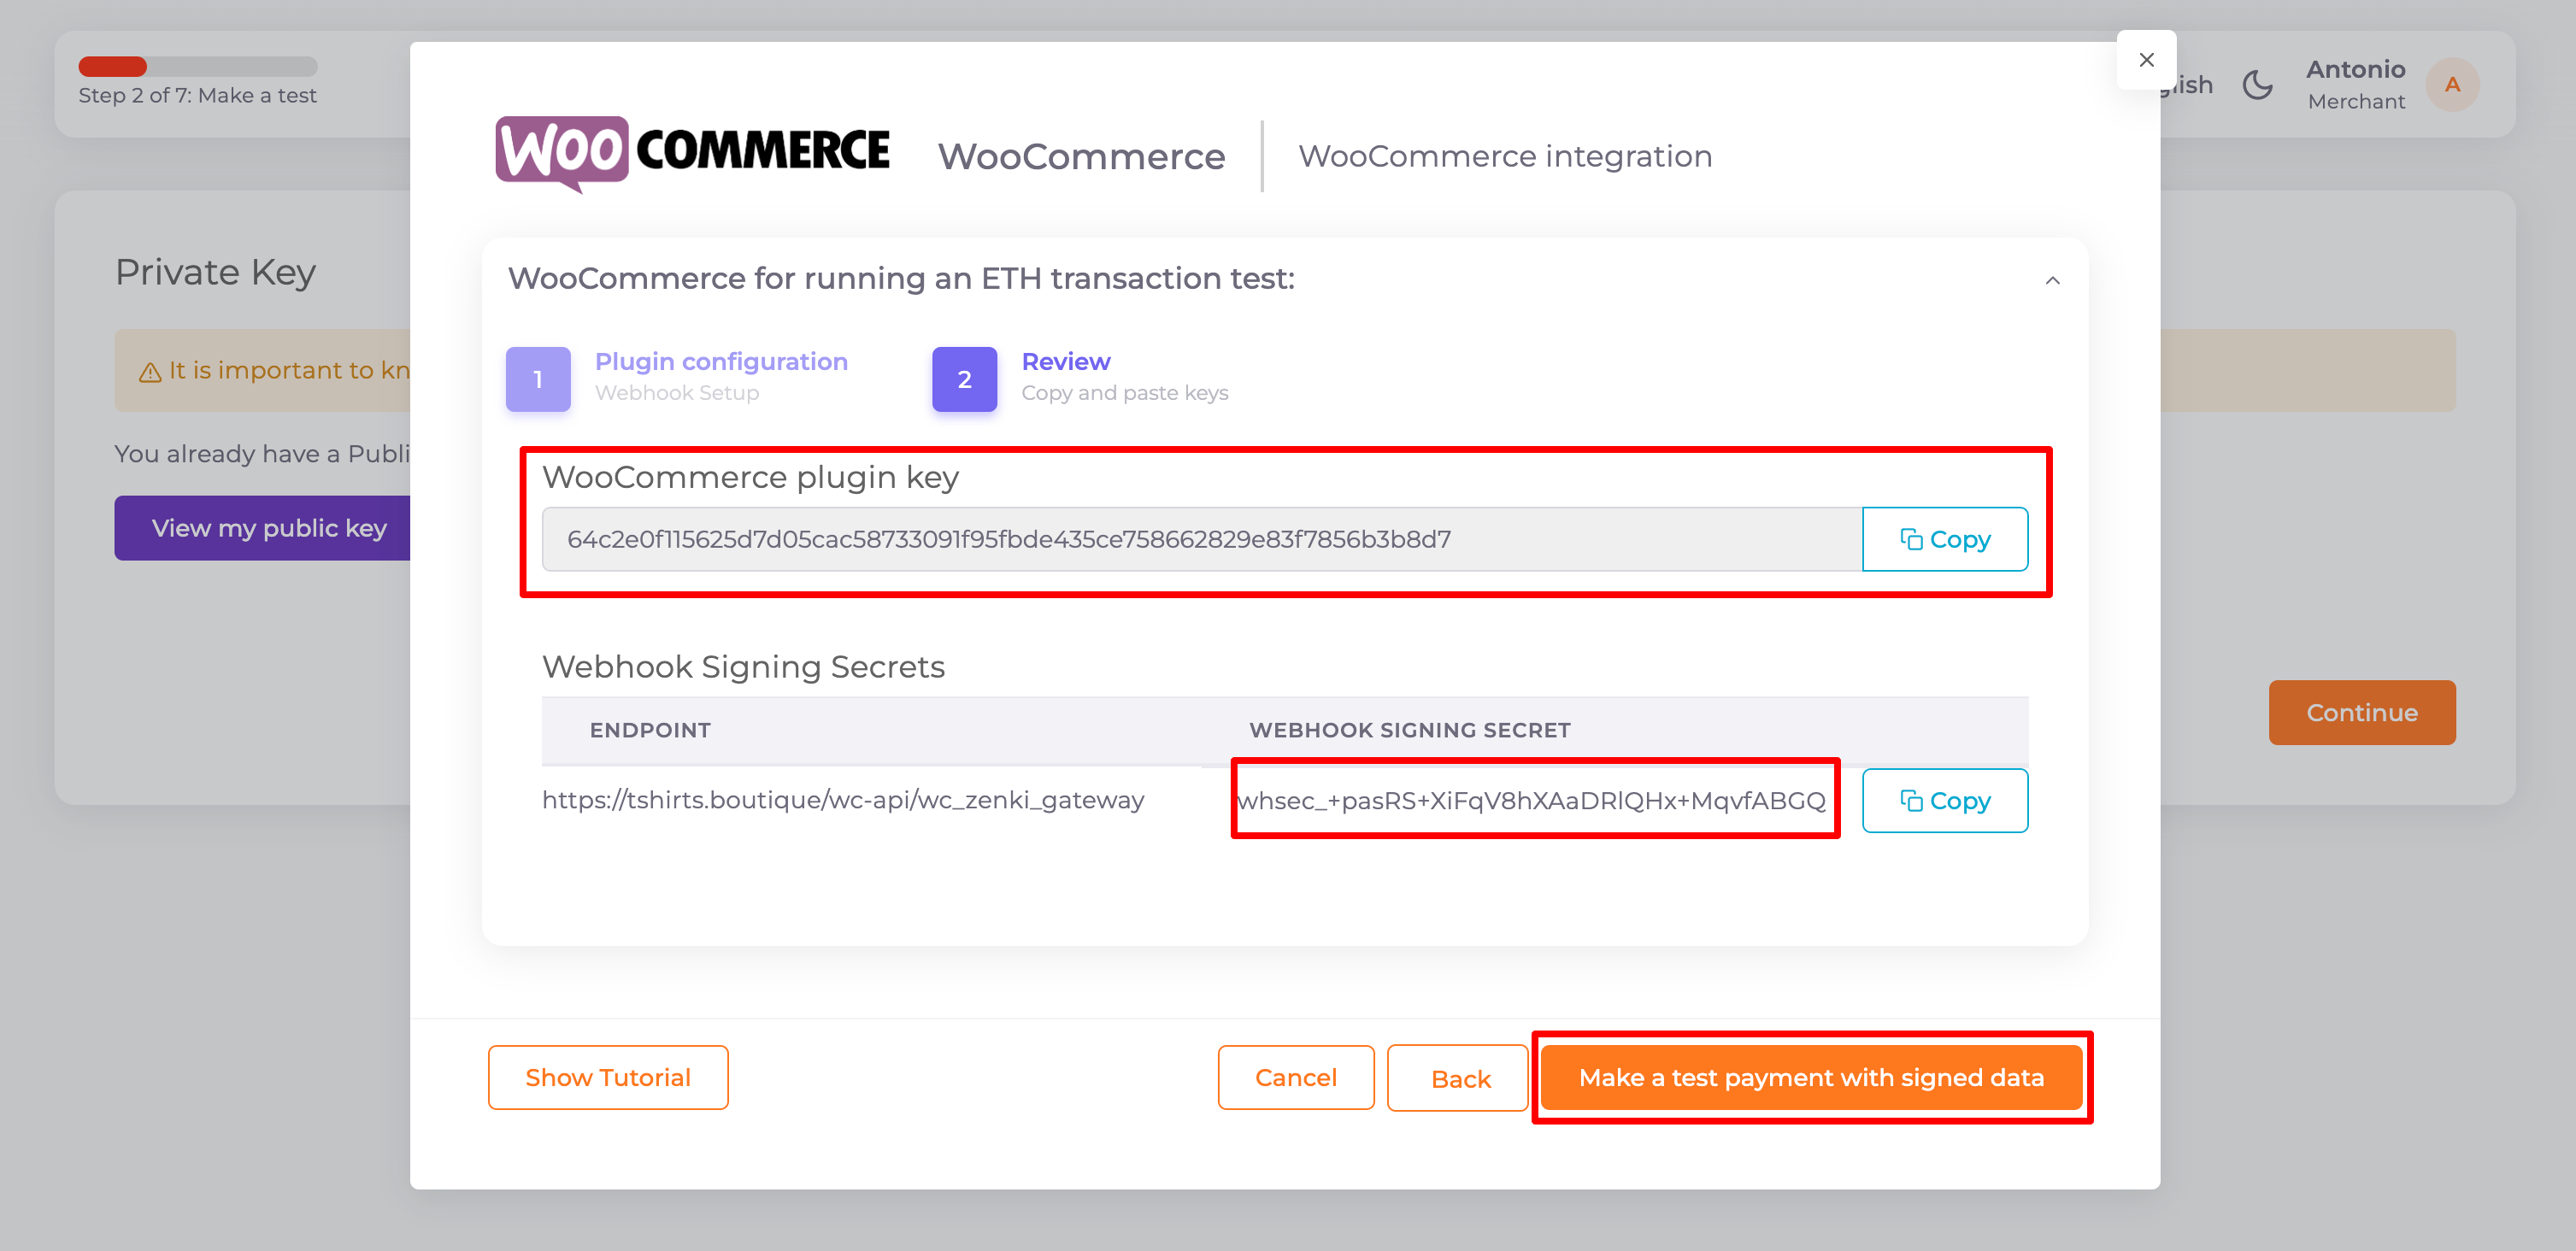
- Finally, you will have all the necessary information to finish configuring the plugin of your choice in your store::
- RSA private key
- Plugin key
- Webhook signing secret
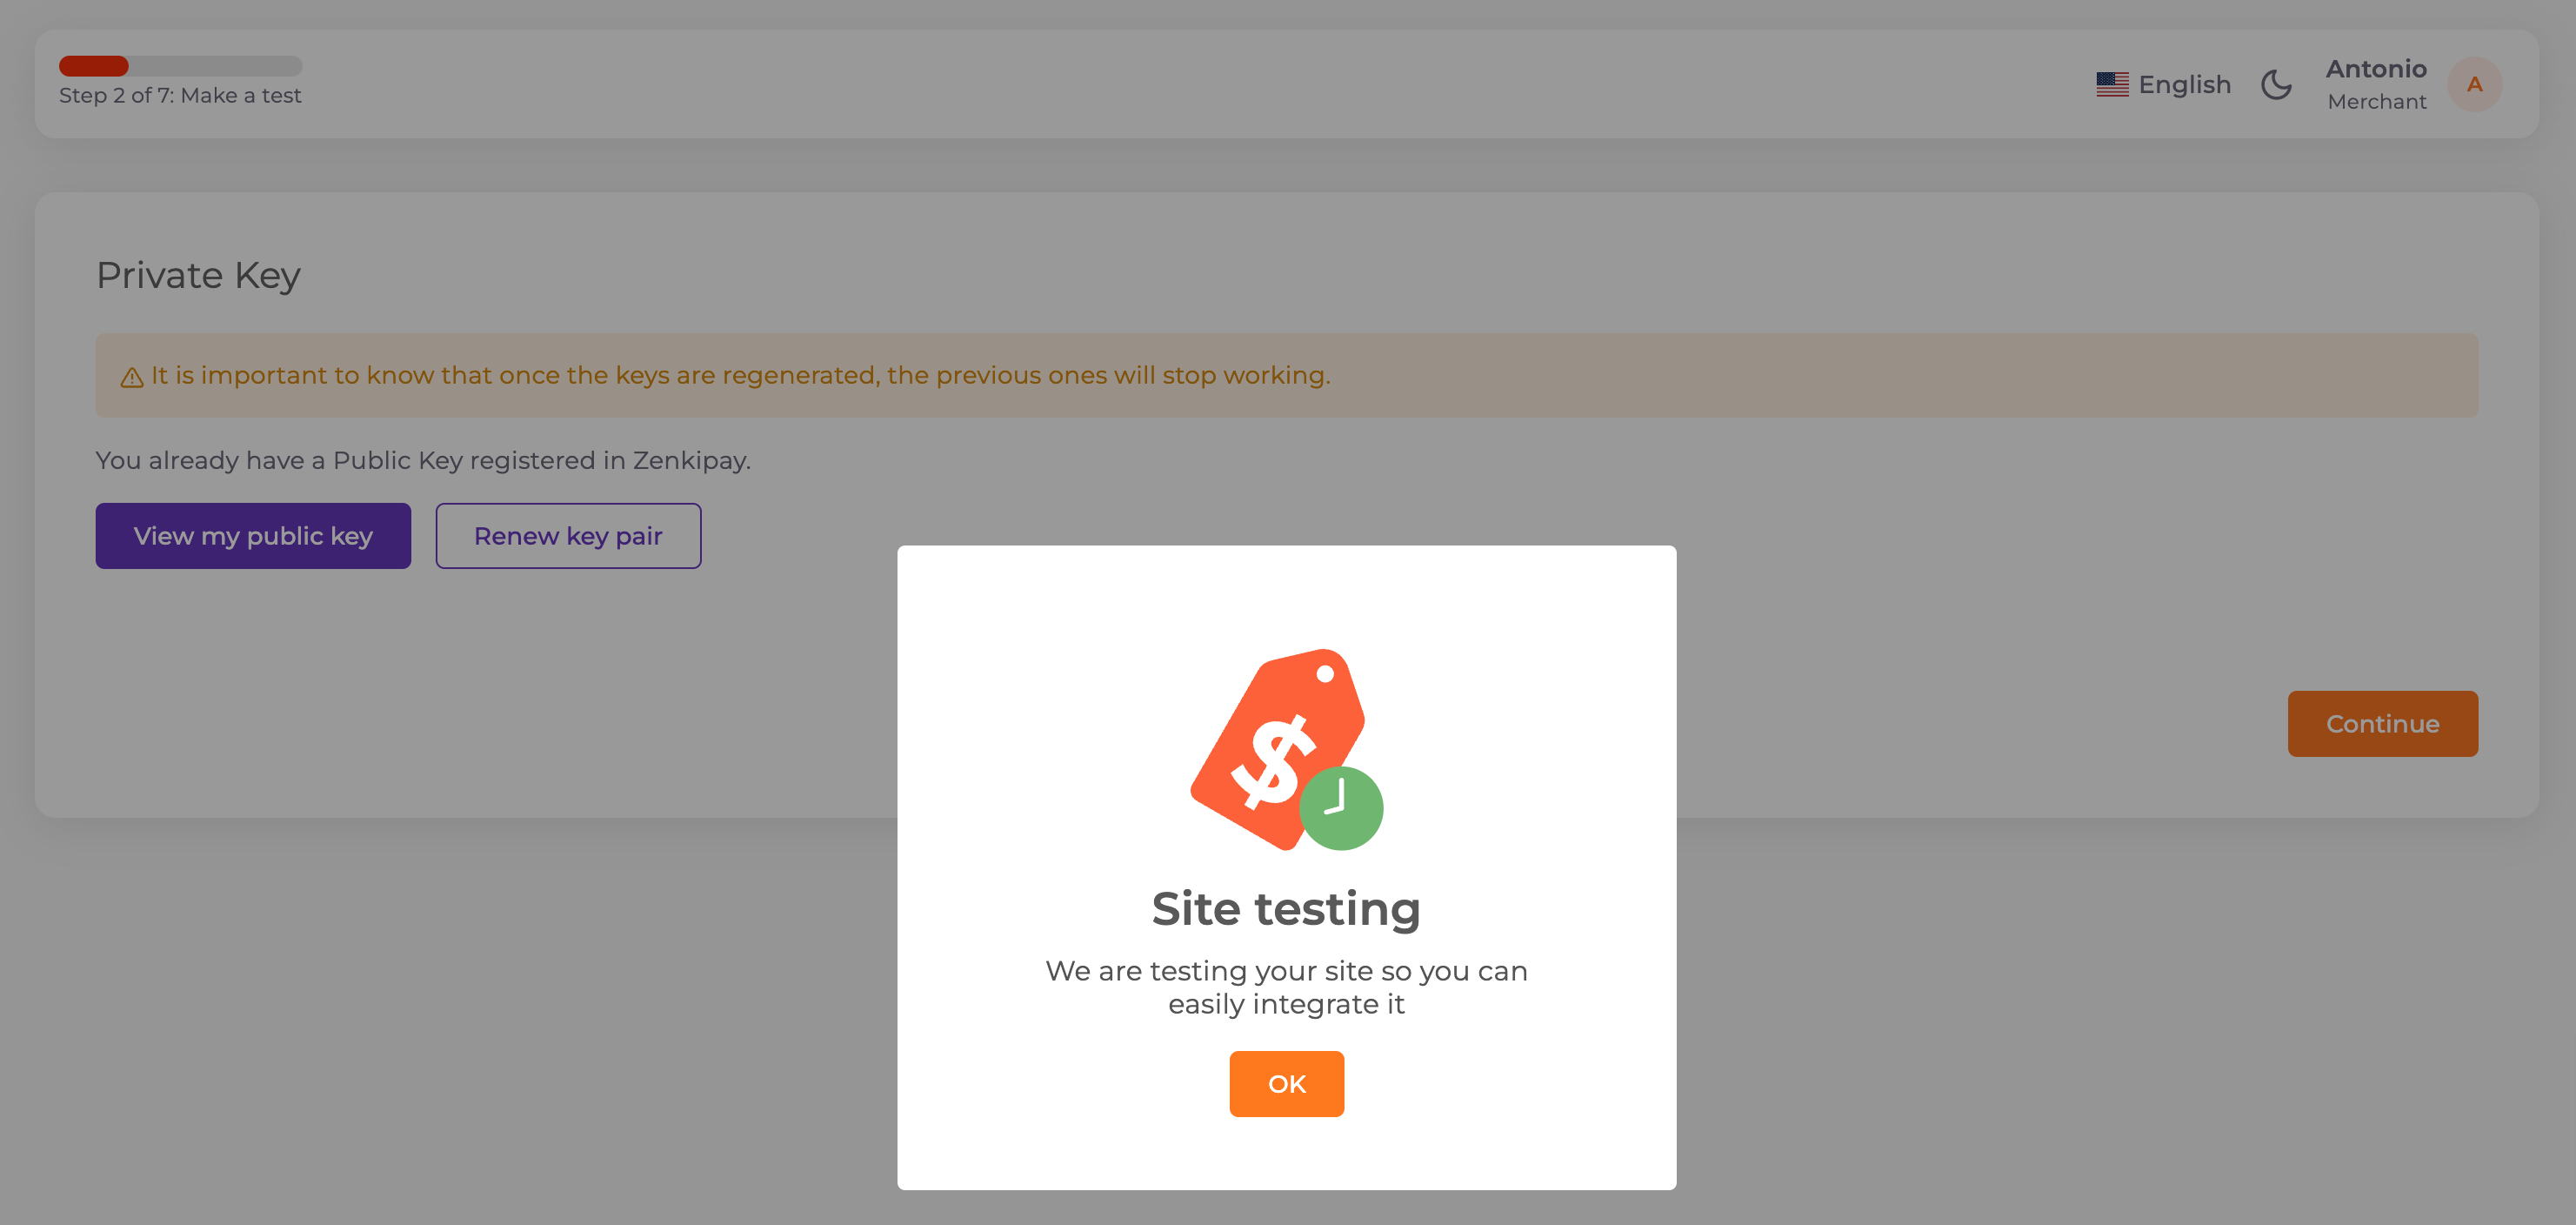
Ahora es necesario realizar una transacción de prueba para continuar con la configuración de tu cuenta de comercio. La plataforma quedará a la espera de que la transacción de prueba sea finalizada, la cual puedes llevar a cabo desde tu tienda una vez que hayas terminado de configurar el plugin.
You can see how to make a payment here.